No measuring and cutting armholes!!
I am so confident about this method that I make the radical claim that this will be the EASIEST PILLOWCASE DRESS METHOD EVER!!
Unfortunately, I am not as confident that I will be able to explain it in this blog in a way that is understandable, but here we go:
To get your measurements,
measure the length from the chest to the hem line. If you are using a serger, add 1 inch for the ribbon pocket and 1 inch for the hem. If you are not using a serger you should add 1 and 1/4 inch for both the hem and the ribbon pocket. To figure the width, I measure the child from one under arm to the other and multiply that measurement by 4.
Or use another dress that is the same size you want still multiplying the width by 4 and adding extra for ribbon pocket and hem.
Cut or "rip" fabric into two identical rectangular pieces. One will be the front and the other the back of the dress.

Serge or zigzag stitch the sides of both pieces on the sides that run from the underarm to the hem.
With right sides together, sew a 5/8 inch seam starting from the hem/bottom and up about 2/3 of the seam then stop short leaving 1/3 open for the armhole openings.
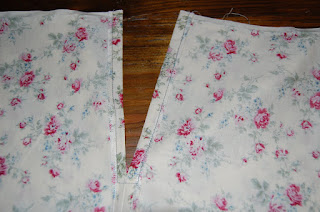
While dress is inside out, press the seam open pretending you had sewn the entire seam. The part that will be the armhole makes V shape opening. See below:


 This is the underside of the armhole.
I used a dark green thread in the bobbin for contrast.
I used a matching thread for the top-stitch
so the top-stitching is hard to see on the right side of the dress.


Then I simply feed the ribbon through the pockets and sew them into place on each side.


